Middle Plate
Last Updated: Sep 09, 2024
This guide is for Differential Drive MBot Classic.
Contents
1. Assemble the main plate
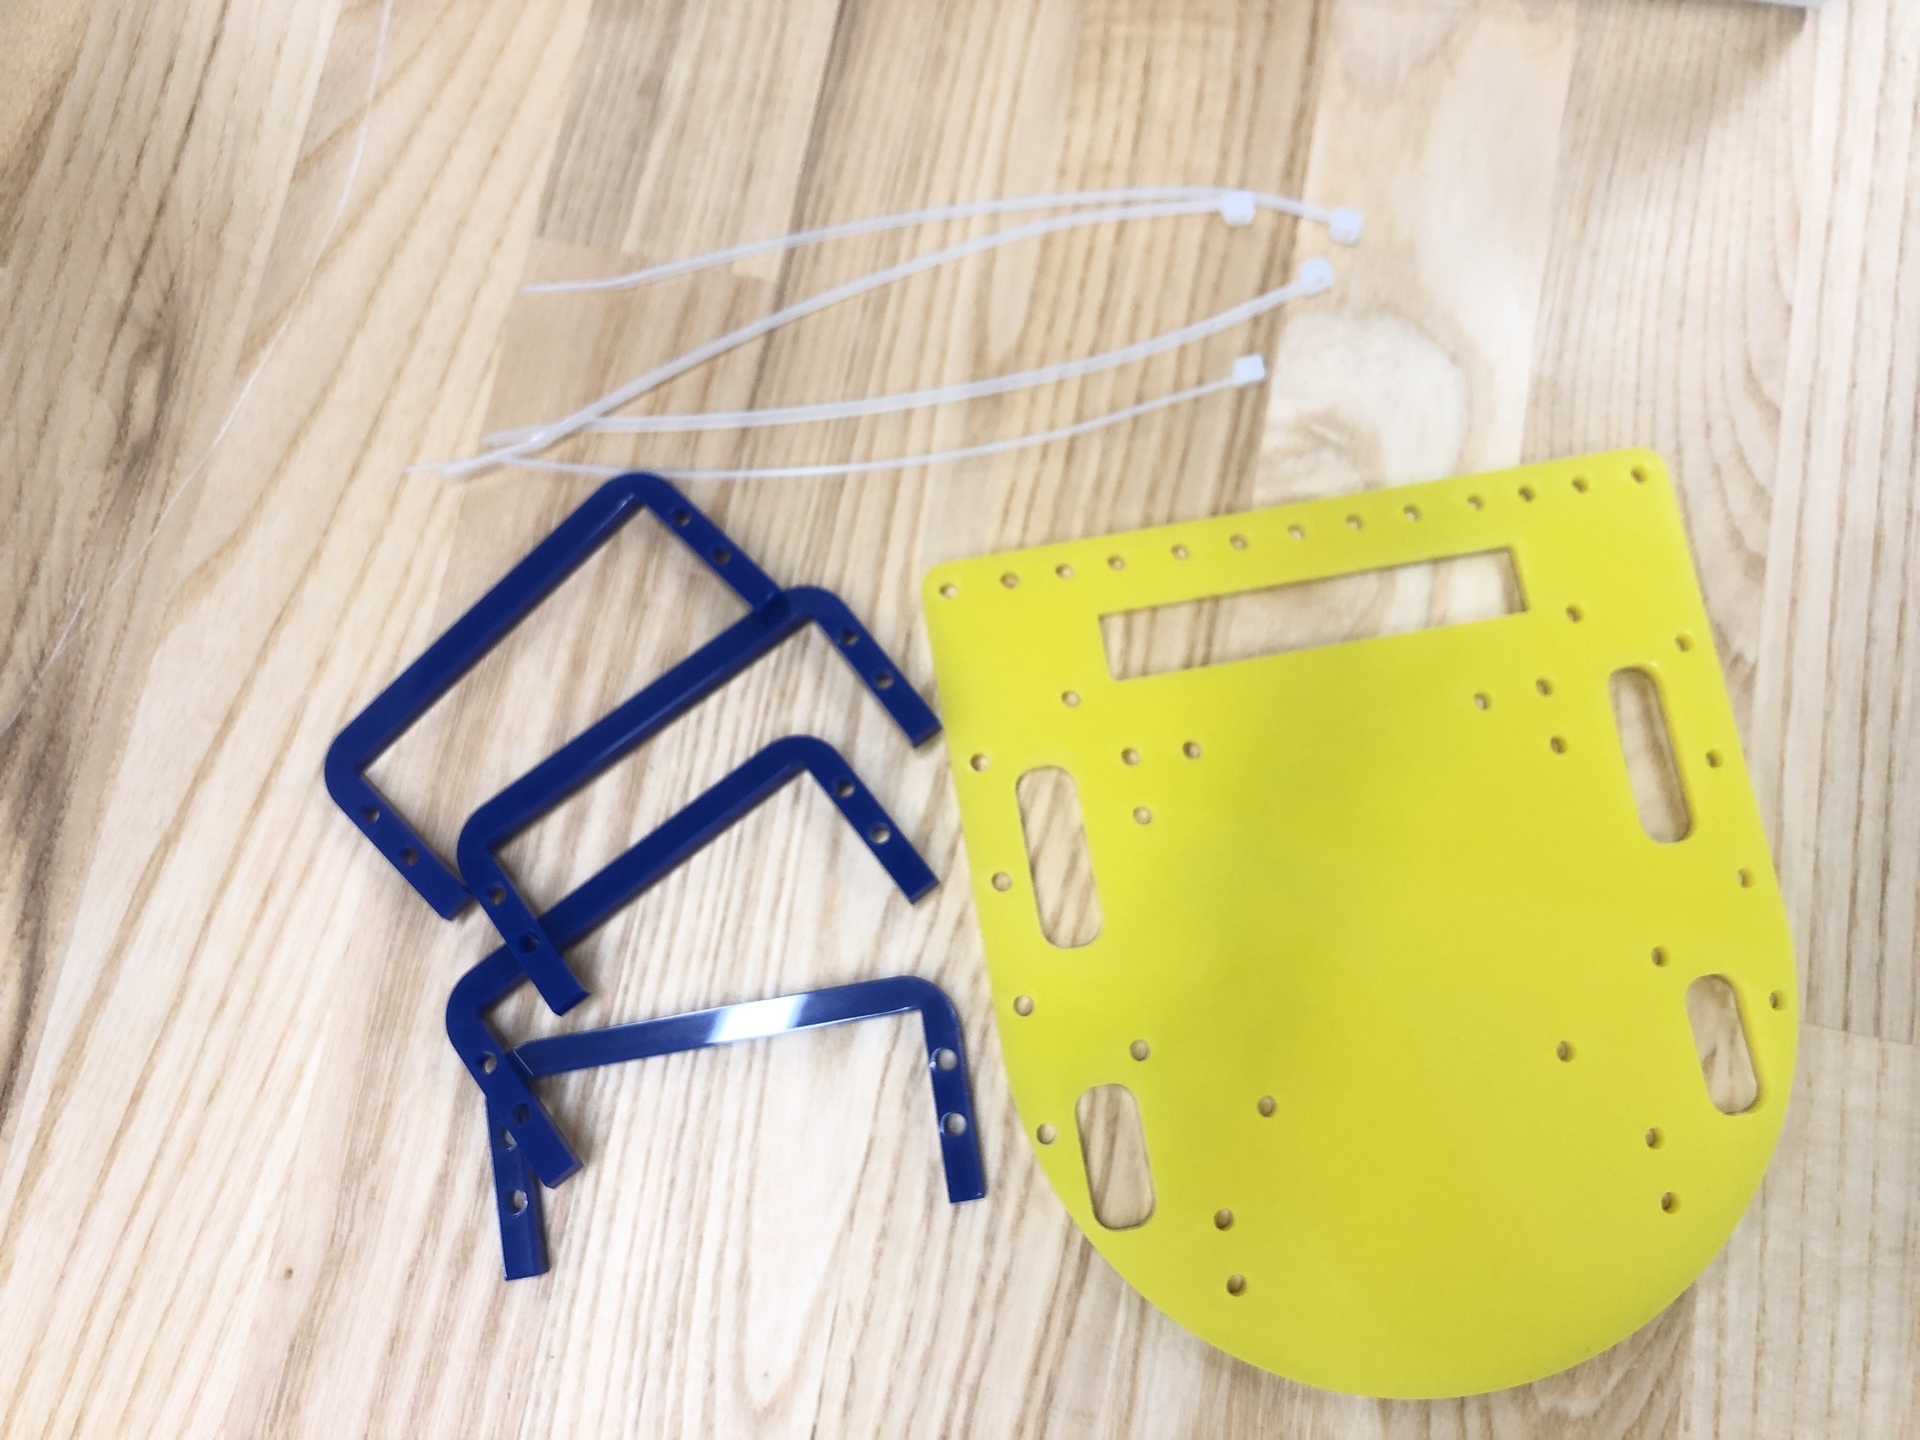
| Components | # | Details |
|---|---|---|
| Middle Acrylic Sheet | 1 | |
| Raspberry PI 5 | 1 | |
| M2.5 8mm Nylon Standoffs | 4 | The grey ones (shortest) |
| M2.5 x 6mm Screws | 8 | Use with Nylon standsoffs |
| 2.5” Aluminum standoffs | 4 | Longest standoffs |
| M2.5 x 8mm Screws | 4 | Use the the 2.5” standoffs |
| M2.5 X 30mm Standoffs | 4 | Second shortest standoffs |
| M2.5 x 6mm Screws | 8 | Use with the 30mm standoffs |
| Zip tie | 4 | |
| battery slot pieces | 4 | U shaped pieces |
-
Assemble the battery slot
Using zip ties and the battery slot pieces, assemble as shown in the images below.

-
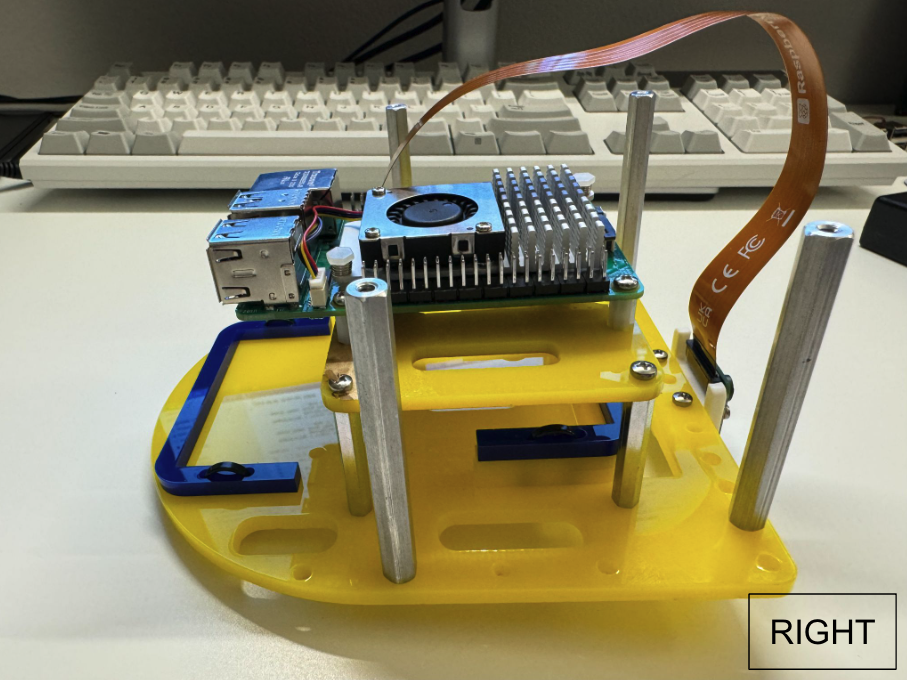
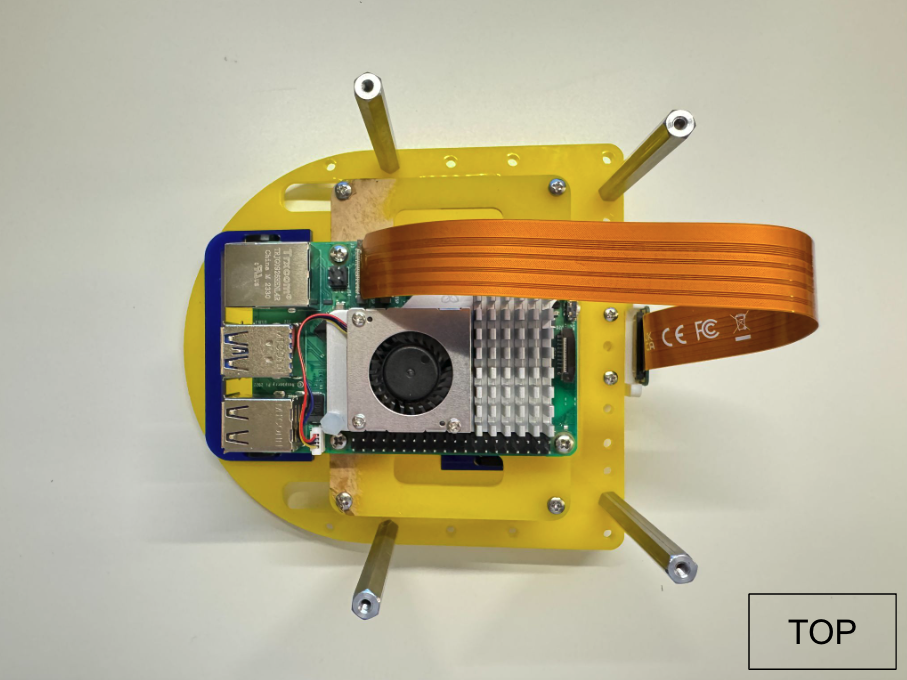
Mount the standoffs and Pi 5
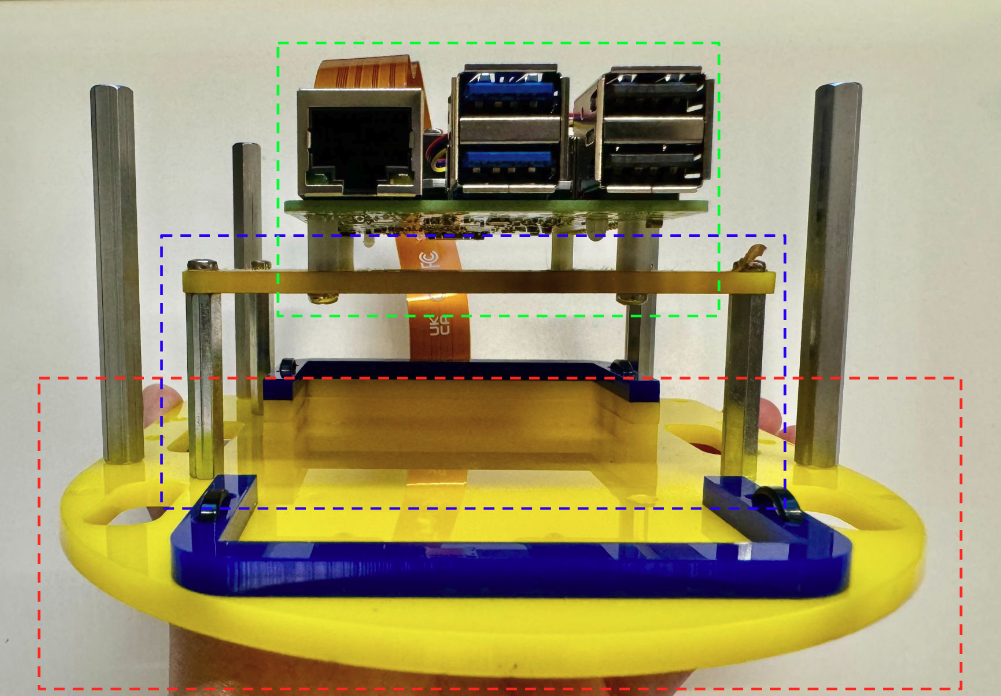
- The Green Box: Where you use the nylon standoffs to attach the Pi 5 to the platform.
- The Blue Box: Where you attach the Pi 5 platform to the bottom.
- The Red Box: Where you mount the 2.5” aluminum standoffs, the longest ones.
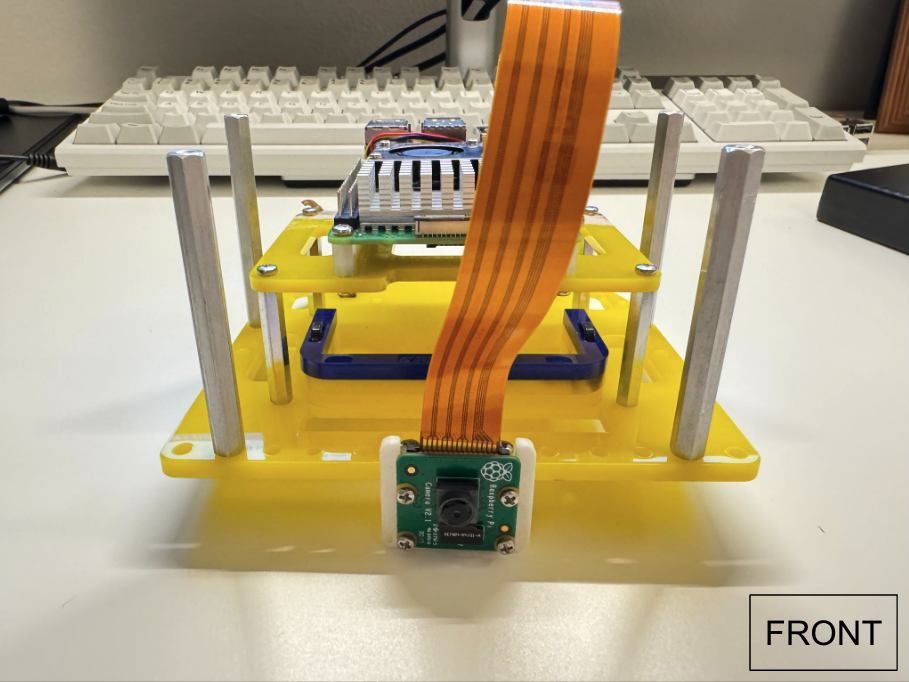
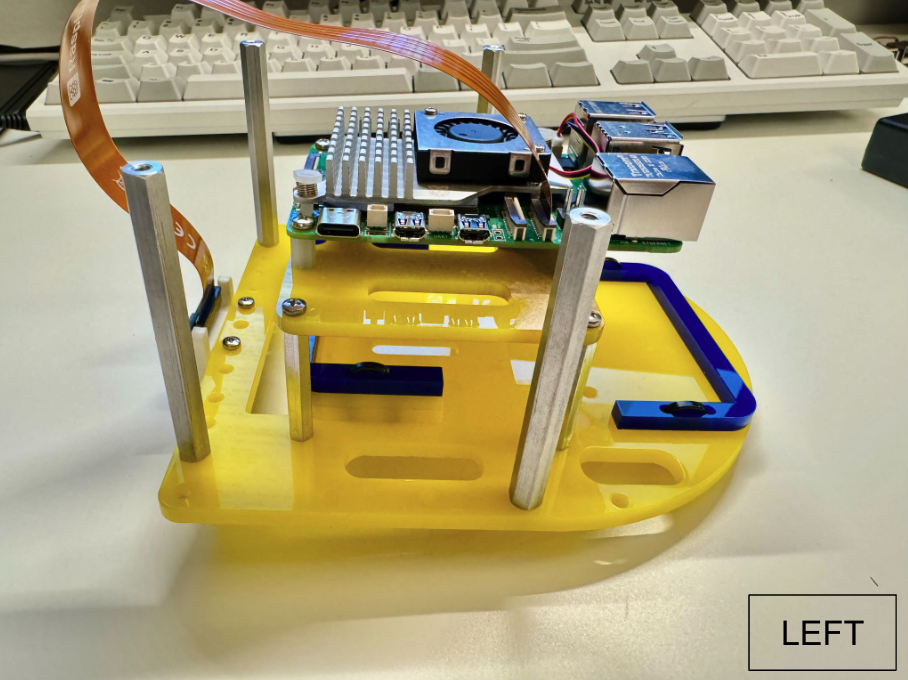
Once you finish all three levels, the result should look like this (without the camera part attached; we will do that in the next step):

2. Attach the camera
| Components | # |
|---|---|
| Camera mount | 1 |
| Camera | 1 |
| 15-to-22 pin camera cable (one end is narrower, and the other is wider) | 1 |
| Transparent spacer for camera | 1 |
| M2 x 6mm Screws | 4 |
| M2.5 x 8mm Screws | 2 |
| M2.5 threaded inserts | 2 |
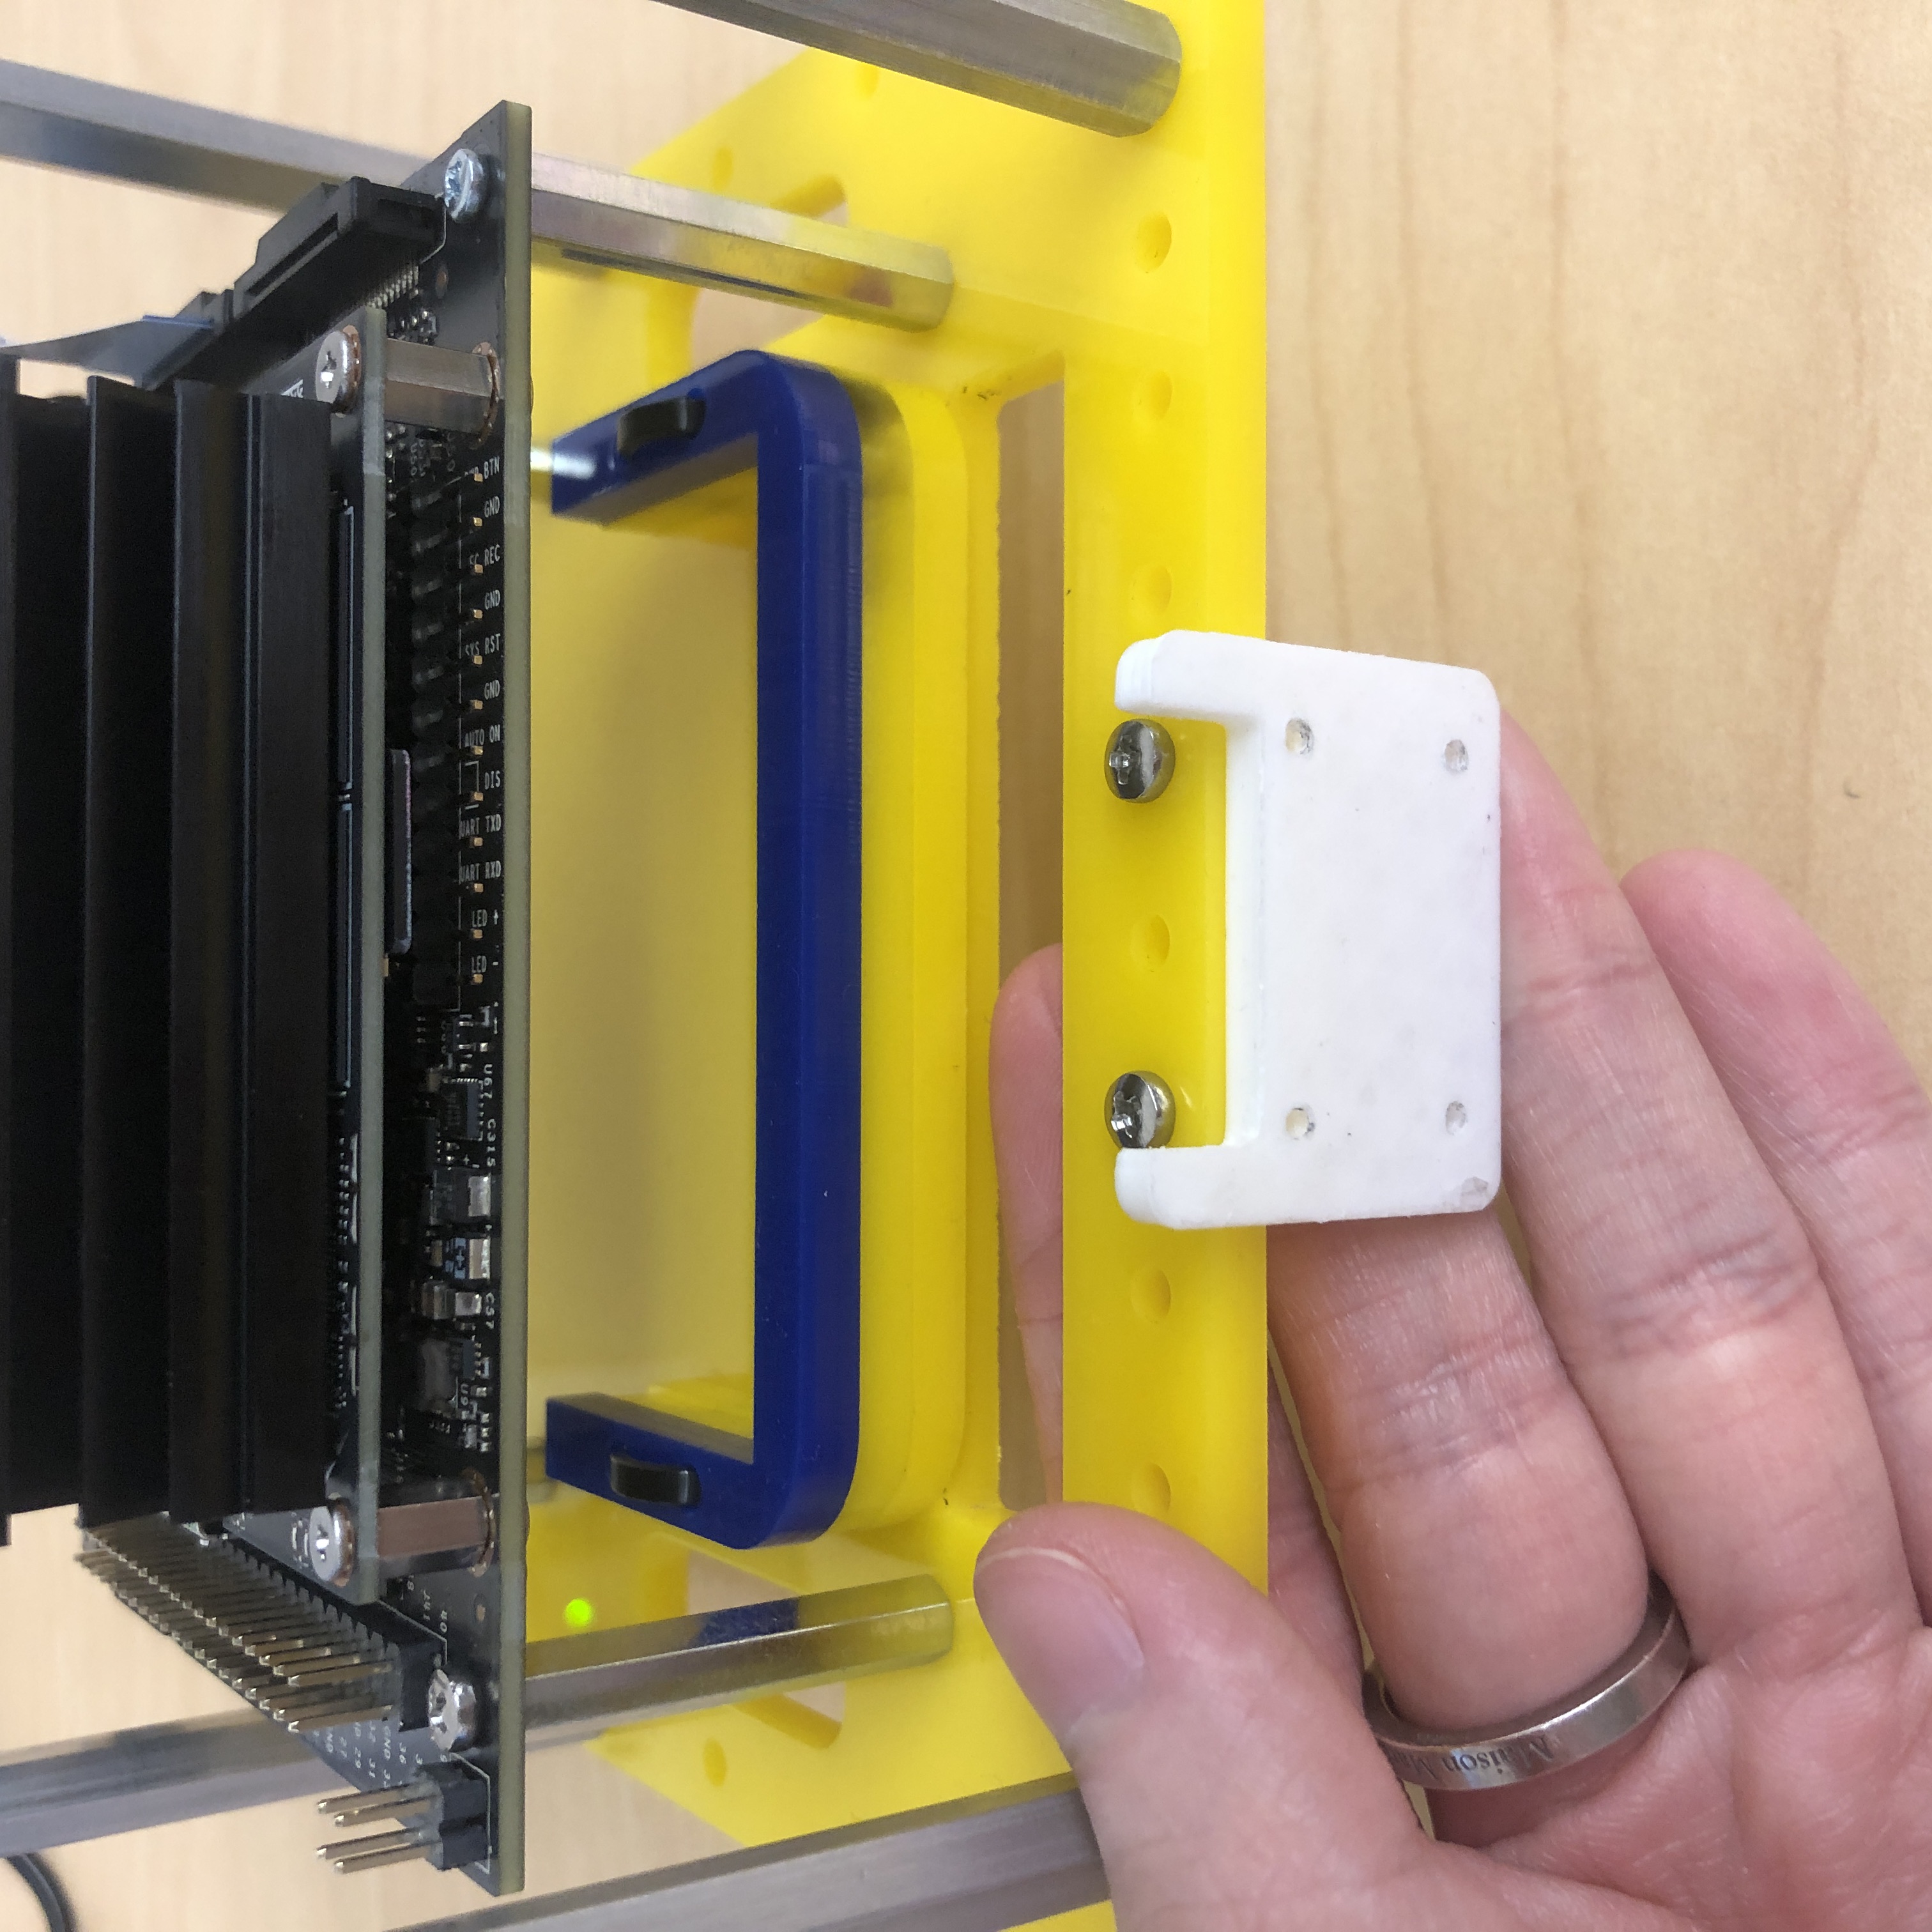
Note that the OLED mount and the camera mount are both white and look similar, but they are different!
- Insert the threaded inserts into the camera mount, you need soldering iron for this to heat up the inserts.
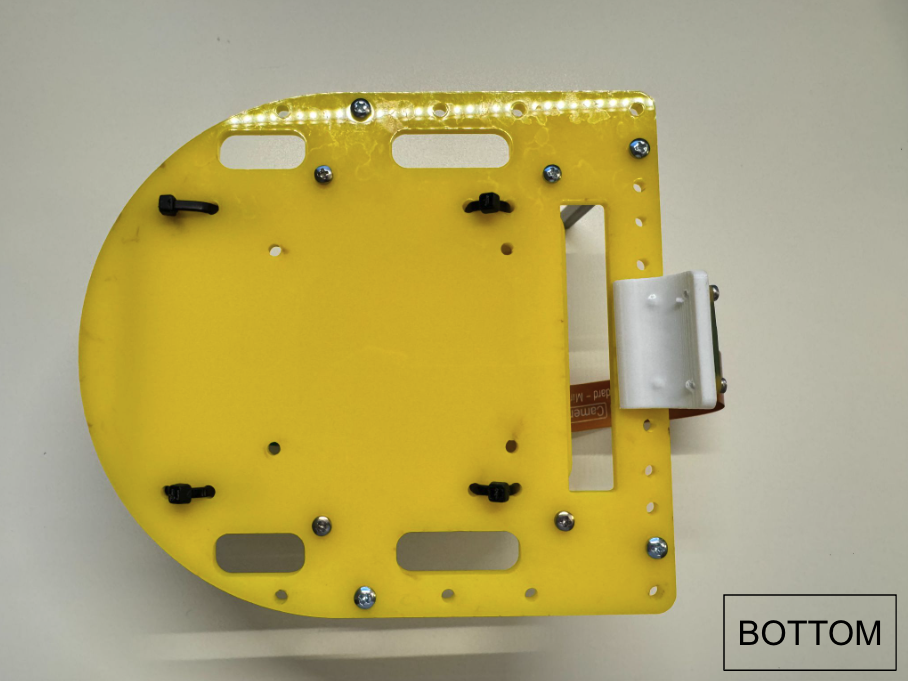
- Attach the camera mount below the middle plate with the screw slot facing upwards, as shown in the image.
-
Next, attach the camera to the mount and put the transparent spacer between camera and the mount to protect the components on the camera’s electronics.
Note: If you can’t find M2 x 6mm screws, M2 x 8mm will also work. However, please be cautious when using the longer screws for the top two holes, as they will stick out and against the middle plate. Avoid overtightening those top two screws.

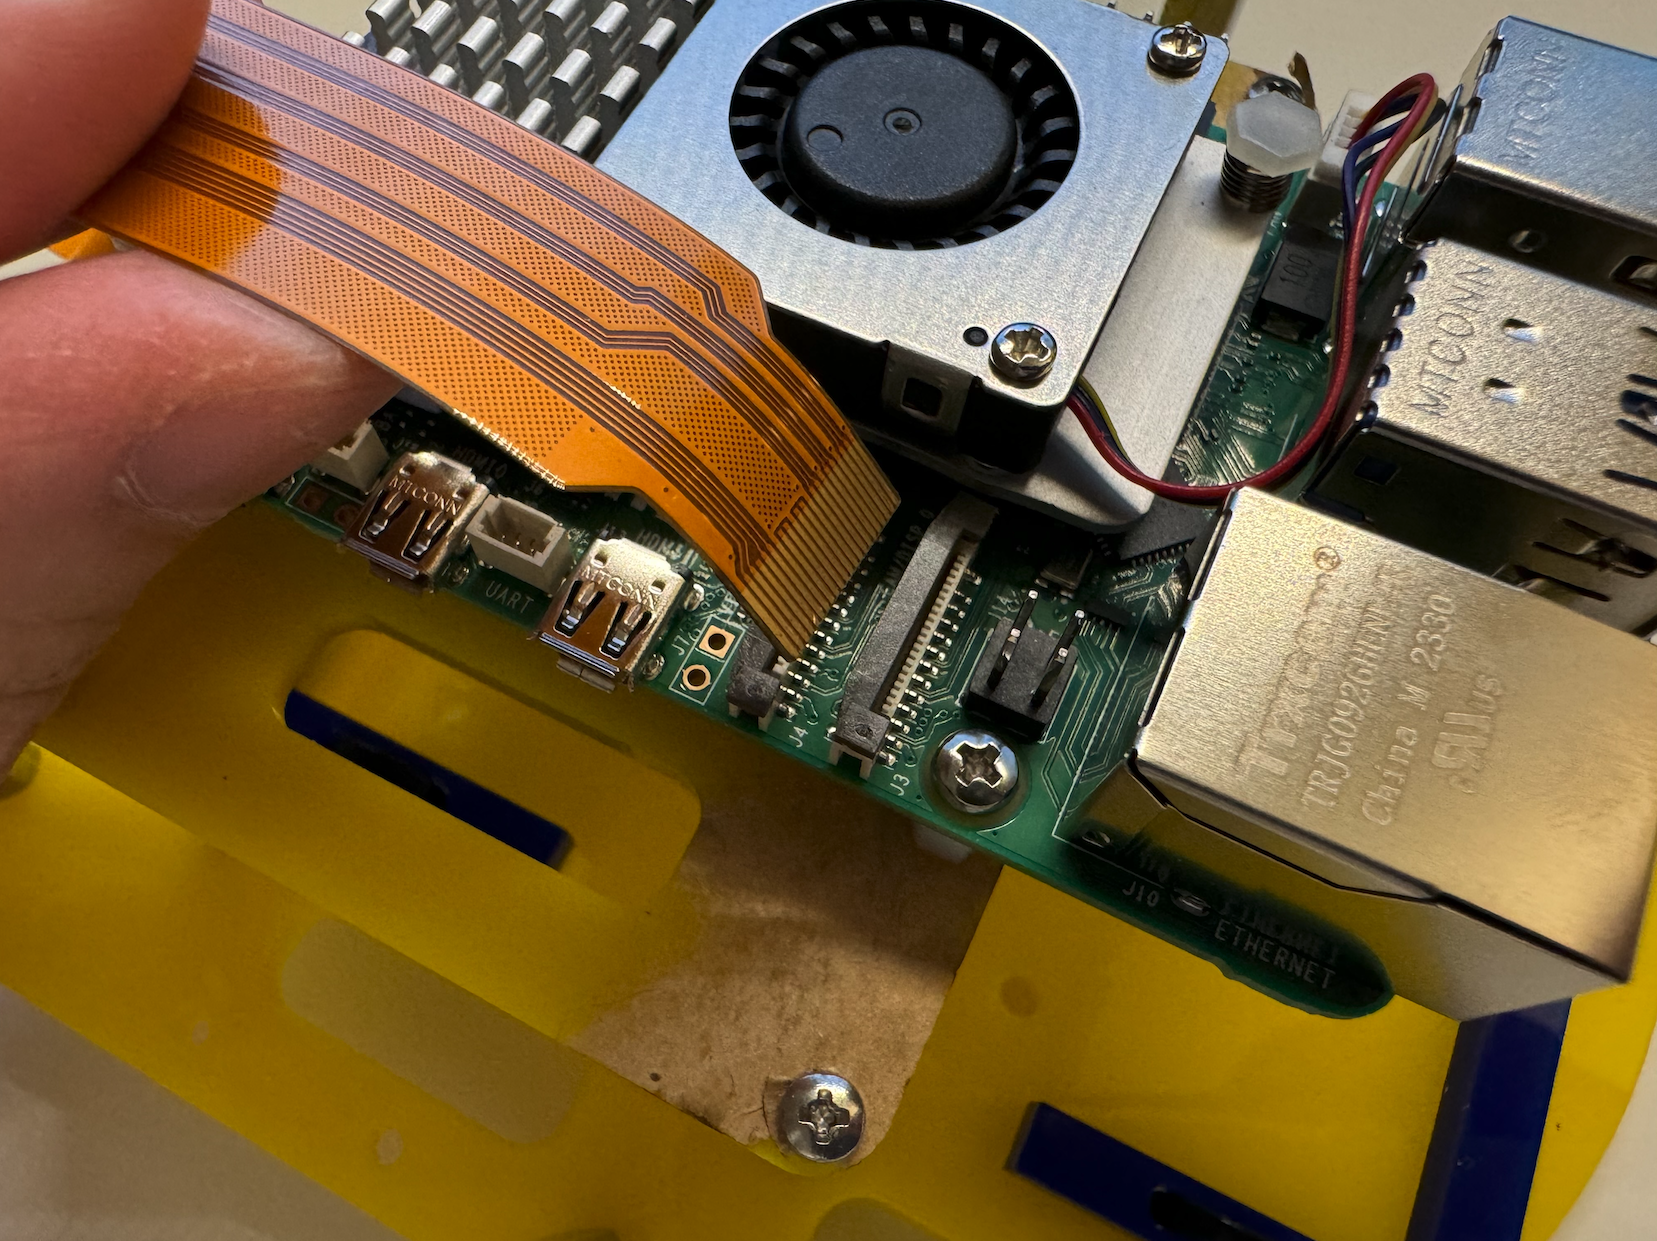
- Insert the camera cable. The wider end goes into the camera, and the narrower end goes into the Pi. You can use any of the Pi’s camera slots.
Credit to Arducam official guide
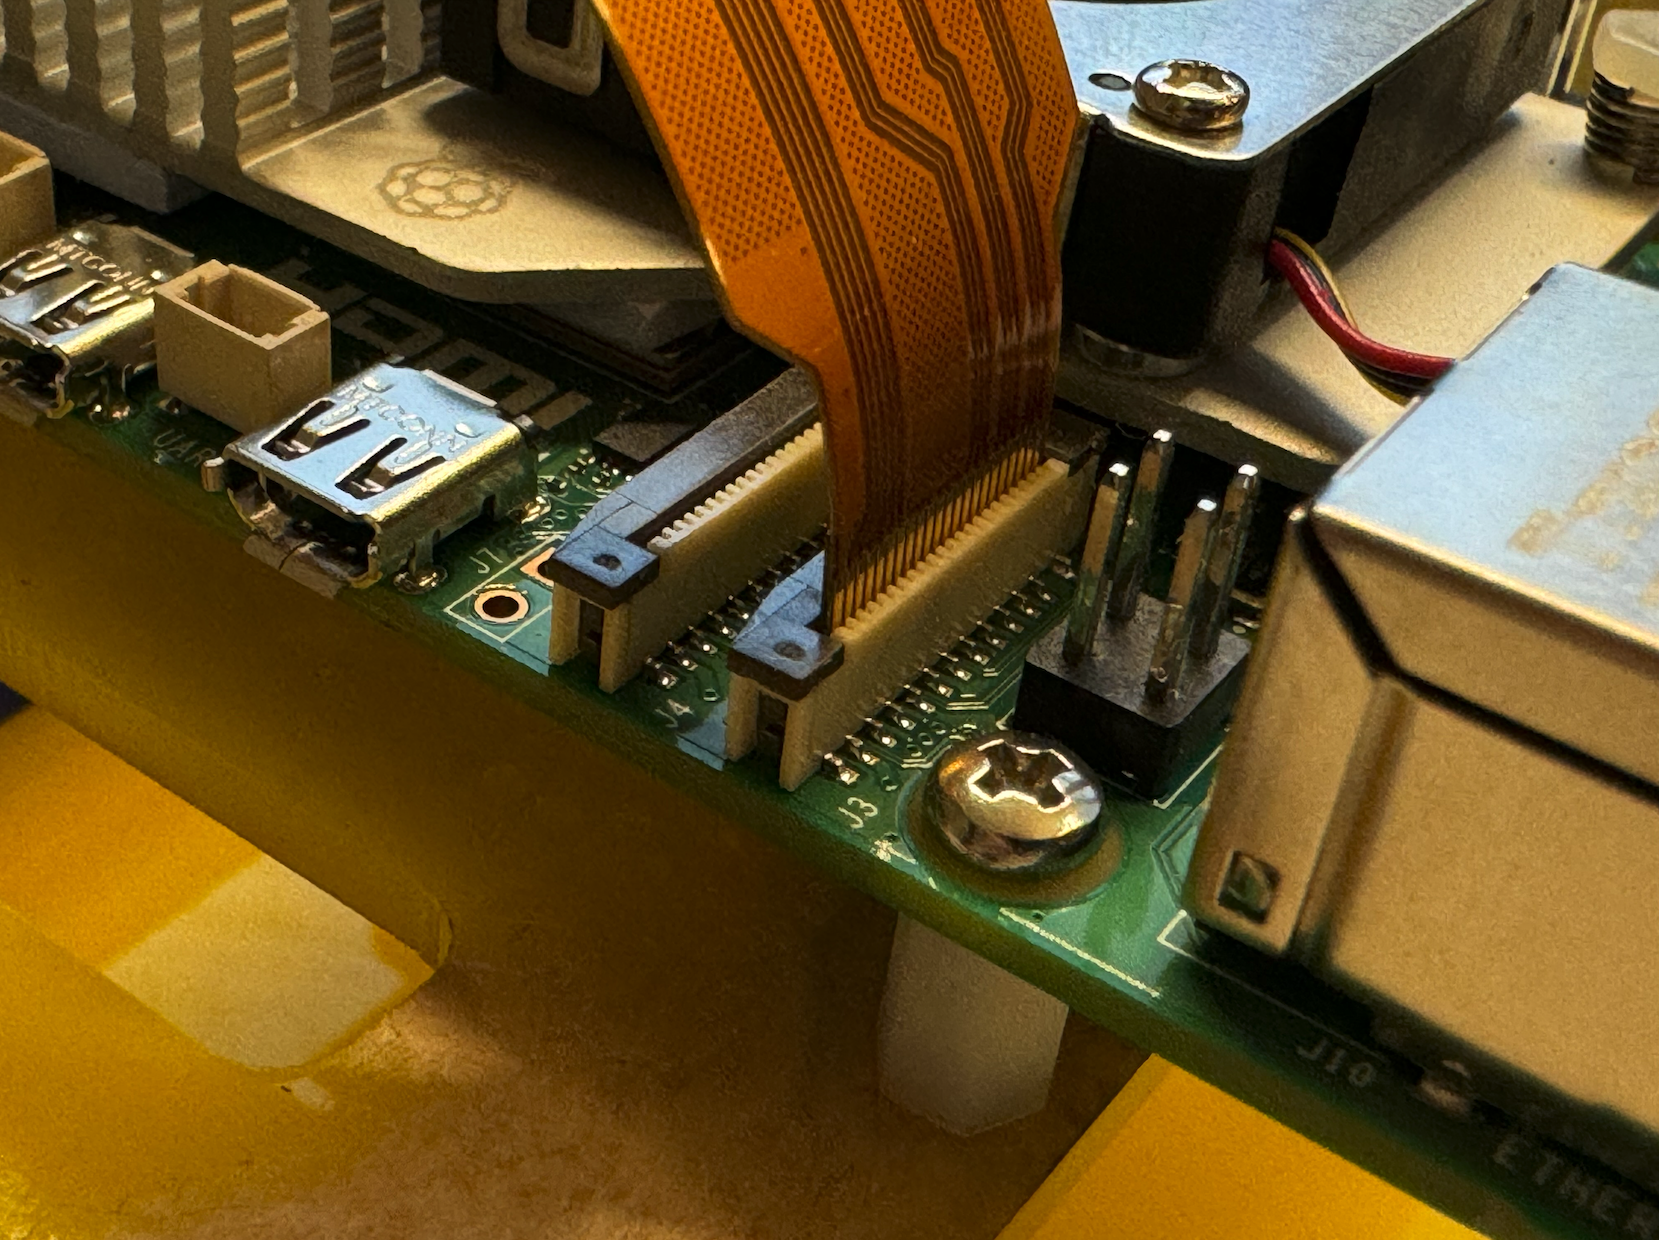
- Gently pull up the plastic edges of the camera port.
- Insert the camera ribbon, ensuring the contacts are facing the correct side as shown in the image.
- Push the plastic connector back down to secure the cable.
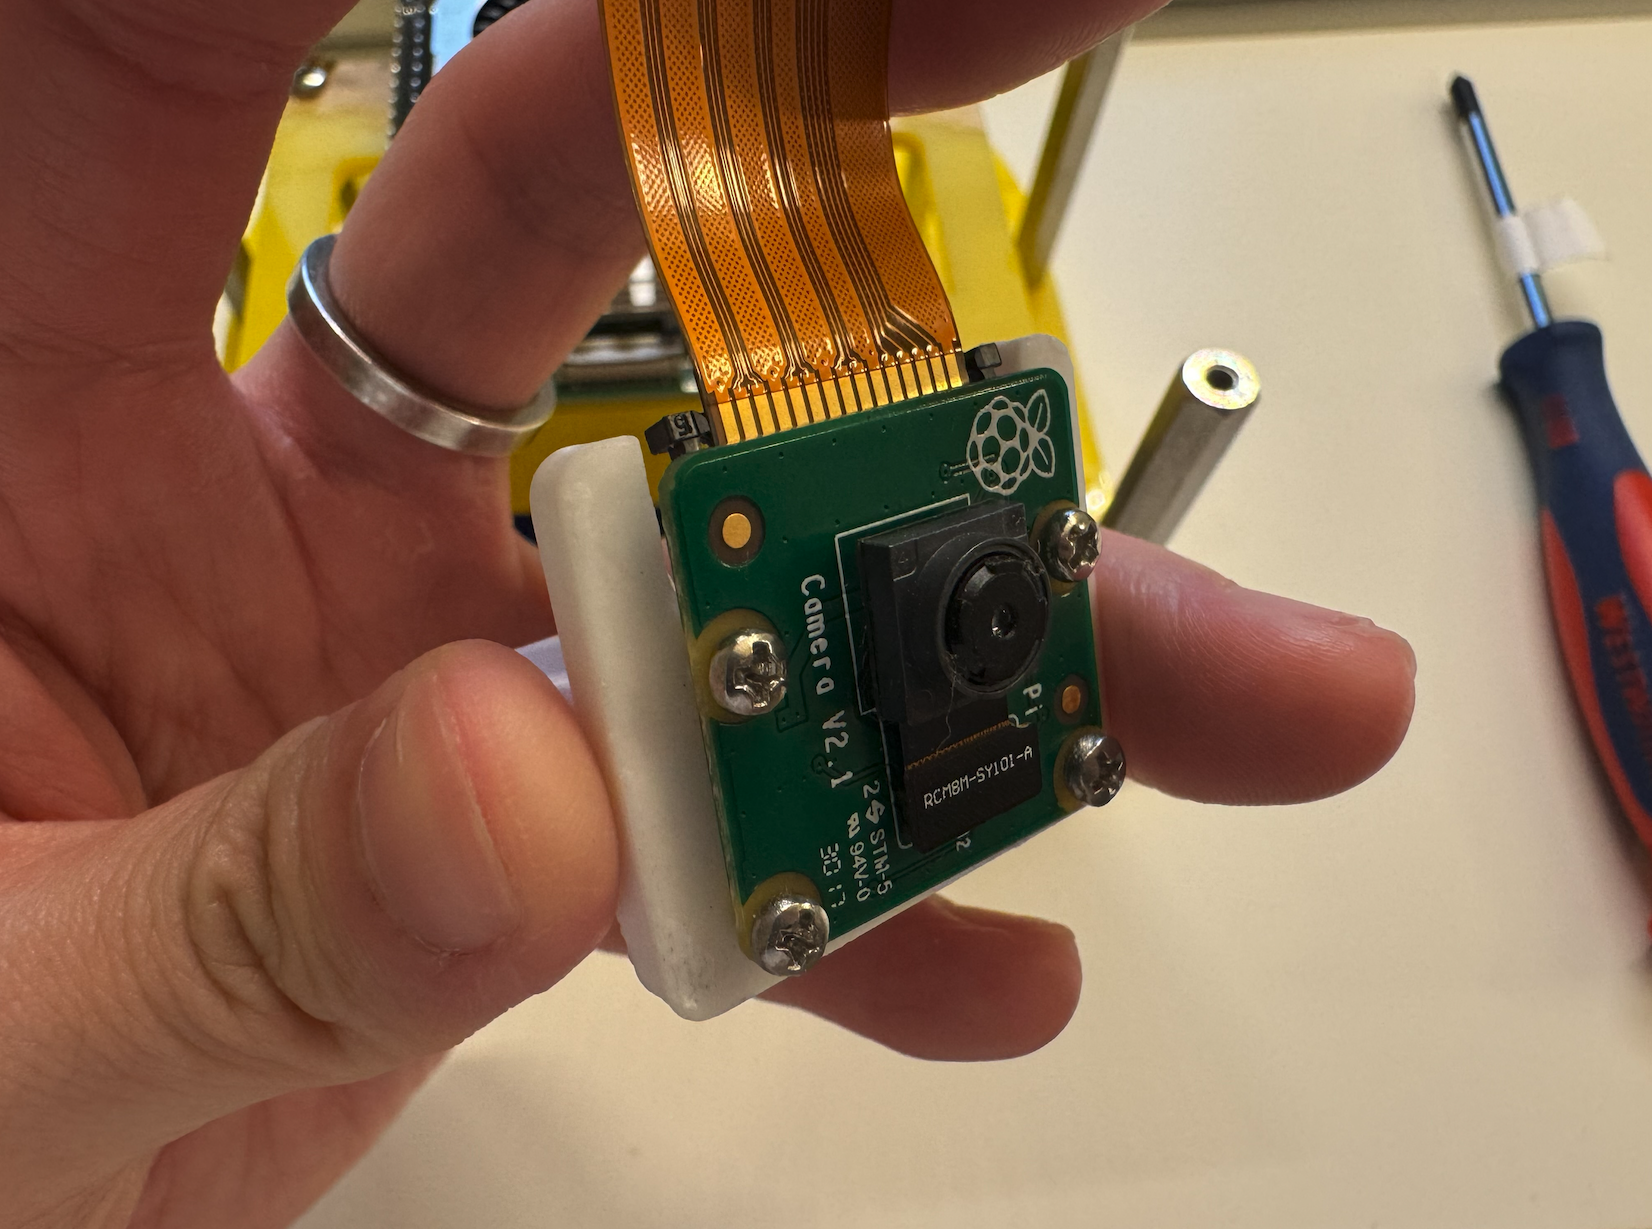
- Then use 4 screws attach the camera to the camera mount.
Now, let’s move on to the top section.