Setup Guide
Last Updated: Sep 02, 2026
This guide will walk you through the setup steps you need before starting Armlab.
Contents
Login to the laptop
In Armlab, each station is provided with a laptop running Ubuntu 24.04:
- If you are in the morning session, log in to ROB550-AM
- If you are in the afternoon session, log in to ROB550-PM
Each laptop and its charger are labeled with a station number, do not remove the stickers. If your team is instructed to switch to a different station, please move without taking the laptops.
Please ensure that you log out of your team account when finished. Before logging out, make sure all running programs are closed and all changes are pushed to GitLab.
Fork codebase
1. Sign into Umich GitLab
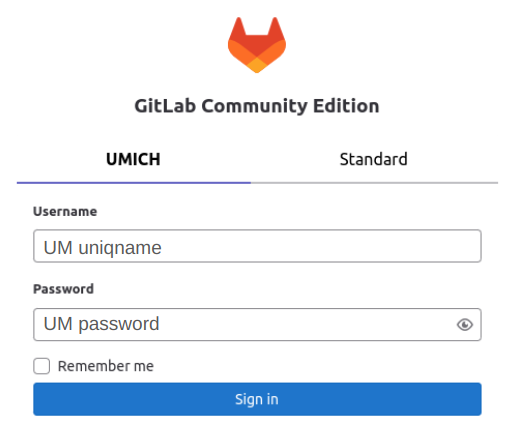
The code that we will be using for this lab is hosted on GitLab. Use your laptop or the lab laptop here, go to this link and use your UM credentials to sign into your account.
For the lab laptop, use an Ethernet cable for a stable internet connection.
2. Create a Group on GitLab and Adding Members
One group member needs to create a GitLab Group and add all members. Follow these steps:
- On the left-hand menu, click on “Groups” to access the Groups page, then click the “New Group” button to initiate the group creation process.
- Group Details:
- Group name: enter
armlab-s<SECTION#>_g<GROUP #>(i.e. armlab-s012_g7) - Visibility level: select “Private”
- Leave other fields blank
- Group name: enter
- Invite your team members as “owners” of the project
- Firstly, go to groups page: sidebar -> groups
- Click your team group
- Add members: sidebar -> Manage -> Members -> invite members
3. Fork Repositories
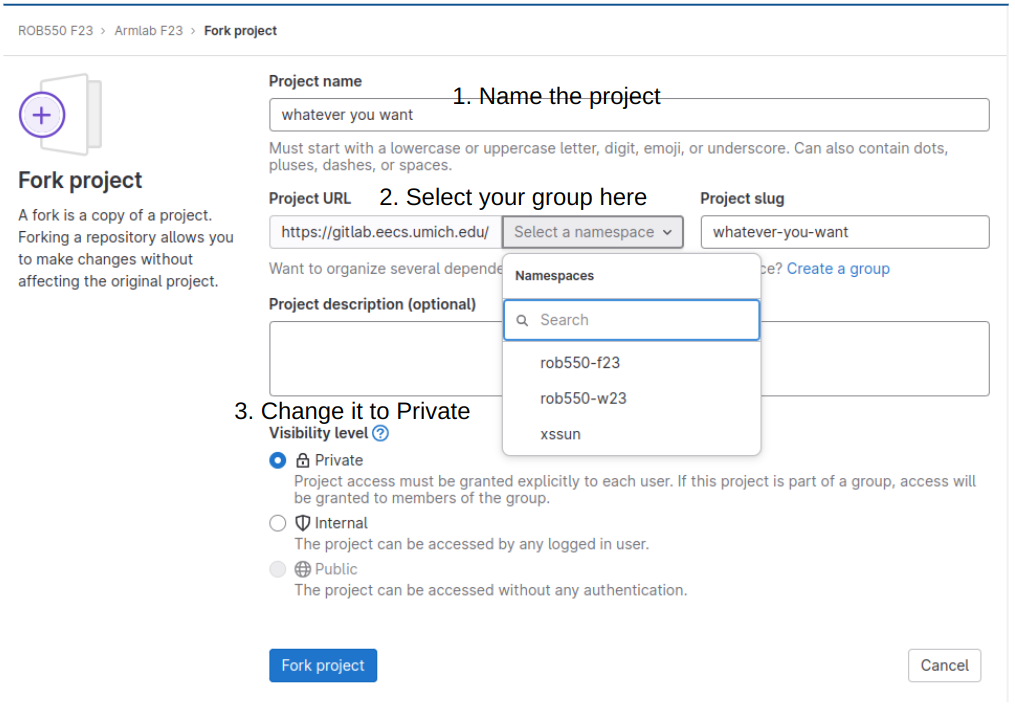
“Forking a repository” refers to the process of creating a personal copy of a repository (a collection of files and code) hosted on a platform like GitHub or GitLab, in our case is GitLab. This copy is entirely separate from the original repository, allowing you to make changes and updates without affecting the original project. In order to create a fork, complete the following steps:
- Navigate to the repository you’d like to fork, in this case, you should fork the armlab-f26 repository
- On the top right, select “Fork”
- You can change the name of the repository if you would like, but the key thing is to change the “Project URL” field so that it is forked into the group you just created.
-
Change the visibility level to “Private”.
4. Install git and VS Code
On the lab laptop, open a Terminal (shortcut: ctrl+alt+t) and install git:
sudo apt update
sudo apt install git
If VS Code is not installed yet, download the .deb package from code.visualstudio.com/download, then install it from the folder you downloaded it into:
sudo apt install ./<downloaded-file>.deb
During the installation a prompt appears asking whether to add the Microsoft apt repository. Use Tab to move between the options, select <Yes>, and press Enter. This is what keeps VS Code up to date through apt.
5. Clone to local
-
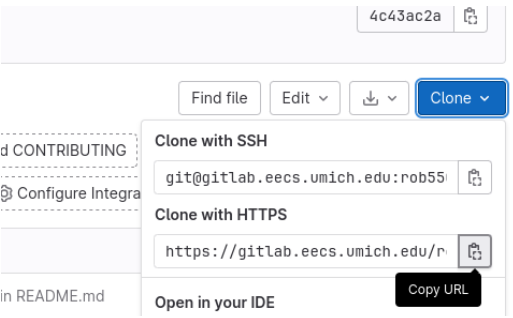
Go to your group’s armlab repository webpage and copy the URL of “Clone with HTTPS”
- On the lab laptop, open a Terminal (shortcut: ctrl+alt+t), run the following commands:
# move to home directory cd ~ # clone the codebase to your laptop git clone https://your_groups_url- To copy-paste anything in the terminal, we can use
ctrl+shift+c/ctrl+shift+v - The
git clonecommand will prompt you for a username and password. Please enter your UMICH credentials.
The repo must be cloned to the home directory
~. If you clone your armlab repo into a subfolder you will not be able to run the control station! - To copy-paste anything in the terminal, we can use
- After cloning the code, enter this command in the terminal to see the cloned directory:
# ls will show all the files/folders under the current directory
ls
The commands we use here are known as Linux command line tools. Understanding the basics of Linux CLT is essential for smooth progress in this class. If you are not familiar with it, this post provides some basic information you need to know.
At this point, you should have your team forked Armlab codebase and cloned it on the Ubuntu laptop at your team’s station.
Installation
To use the code, firstly, we need to install all the dependencies/SDKs we need.
Open a terminal, navigate to your armlab repository, and run the three scripts below in this order. Each one is safe to re-run if something goes wrong.
1. Install Anaconda
./install_scripts/install_anaconda.sh
source ~/.bashrc
- Tip: The “TAB” key is a handy tool for auto-completing your input commands. For instance, try typing “./install_scripts/install_an” and then press the “TAB” key. This should automatically complete the rest of the command for you.
- Note: If the auto-complete feature does not work, it often indicates insufficient permissions for the install script file, which may also prevent the file from running. To address this, grant the necessary permissions using the command:
chmod +x ./install_scripts/*.sh
Wait until it’s complete before proceeding to the next step.
2. Create the conda environment
./install_scripts/install_conda_env.sh
- This creates the
env550labenvironment, which is where all of the code runs.
3. Install the camera stack
Unplug the camera cable from the laptop before running this.
./install_scripts/install_camera.sh
source ~/.bashrc
- This step builds the RealSense driver from source, expect 5~20 minutes.
Step 3 must come after step 2. It builds the RealSense Python binding against the env550lab interpreter, so the environment has to exist first. The script stops with an error message if you run it too early.
After this, every new terminal you open starts in env550lab already, you do not need to activate it by hand.
4. Set your station’s arm IP
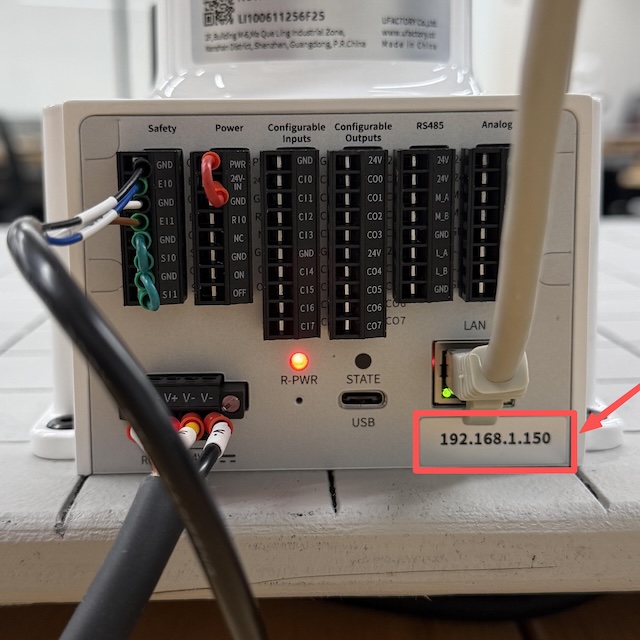
Open src/lite6arm.py and set XARM_IP to the IP address of the arm at your station. The IP address is on a label beside the LAN port, on the I/O panel at the back of the arm’s base.
At this point, running python -c "import pyrealsense2, cv2, xarm" in a new terminal should print nothing and exit without an error.
Testing
After successfully installing all the necessary components for the workstation, now it is time to test.
Run in simulation
You can check that the installation worked without touching the hardware. Open a terminal and start the simulator:
mujoco-sim
- This one starts the MuJoCo simulation of the arm. Remember that to halt it, use
ctrl + Cin its terminal. Until you stop it, the terminal will be occupied. If you need to run another command, open a new terminal.
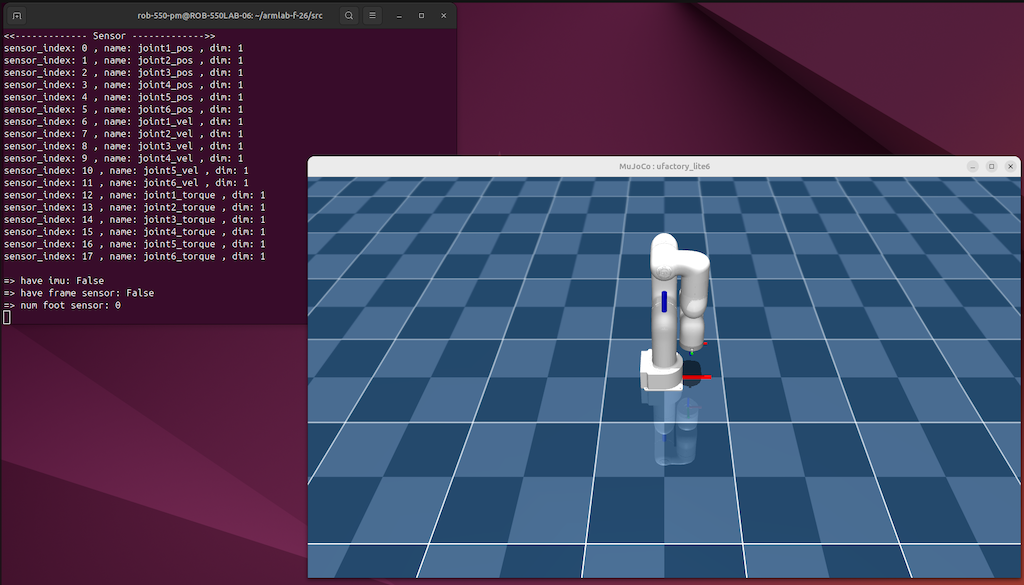
Then in a new terminal, run the following command:
cd src
python control_station.py --sim
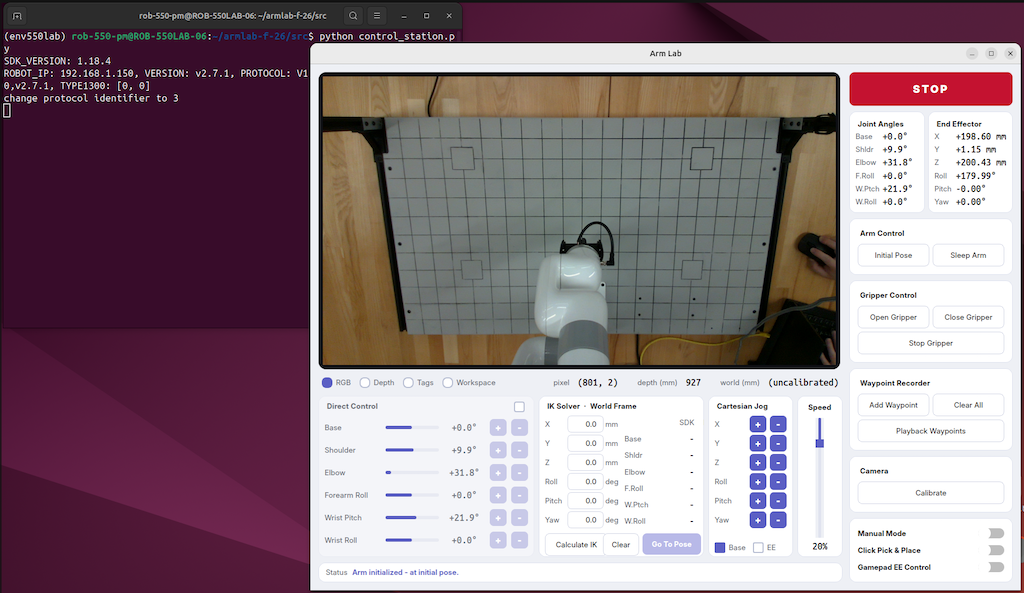
- This one starts the control station GUI, driving the simulated arm. The GUI looks the same whether it is driving the simulator or the real arm, so see the screenshot below.
Run on the real arm
Connect the camera USB and the arm to the lab laptop, then in a terminal run:
cd src
python control_station.py
- To stop the control station, you just need to close the GUI window.
Result
The control station GUI opens and the joint readouts update live. We will talk about how to control the arm later in the checkpoint 1.
- To quit the control station, close the GUI window
- To quit the simulator, hit ctrl+c in its terminal
Click Sleep Arm before you close the GUI. This drives the arm back to its home position and then powers down the motors.
Closing the GUI on its own does not do this, the arm stays where it is with the motors still on.
At this stage, you should have the control station GUI launched, indicating that you have completed the setup for Armlab. You can now proceed to the checkpoints if you wish.